The show date is fixed, the 20×30 space is reserved, and the brand team needs a design direction that can move into production. The useful questions are specific: which surfaces accept graphics, how far the structure can change, what files the shop needs, and when the booth can be seen before it leaves the shop. For a pre-designed 20×30 island rental like RLU2030-115, the path runs from the base structure to modular frame and lightbox adjustments, the hanging sign, artwork handoff, and pre-build preview.
How the custom path starts from a standard 20×30 rental
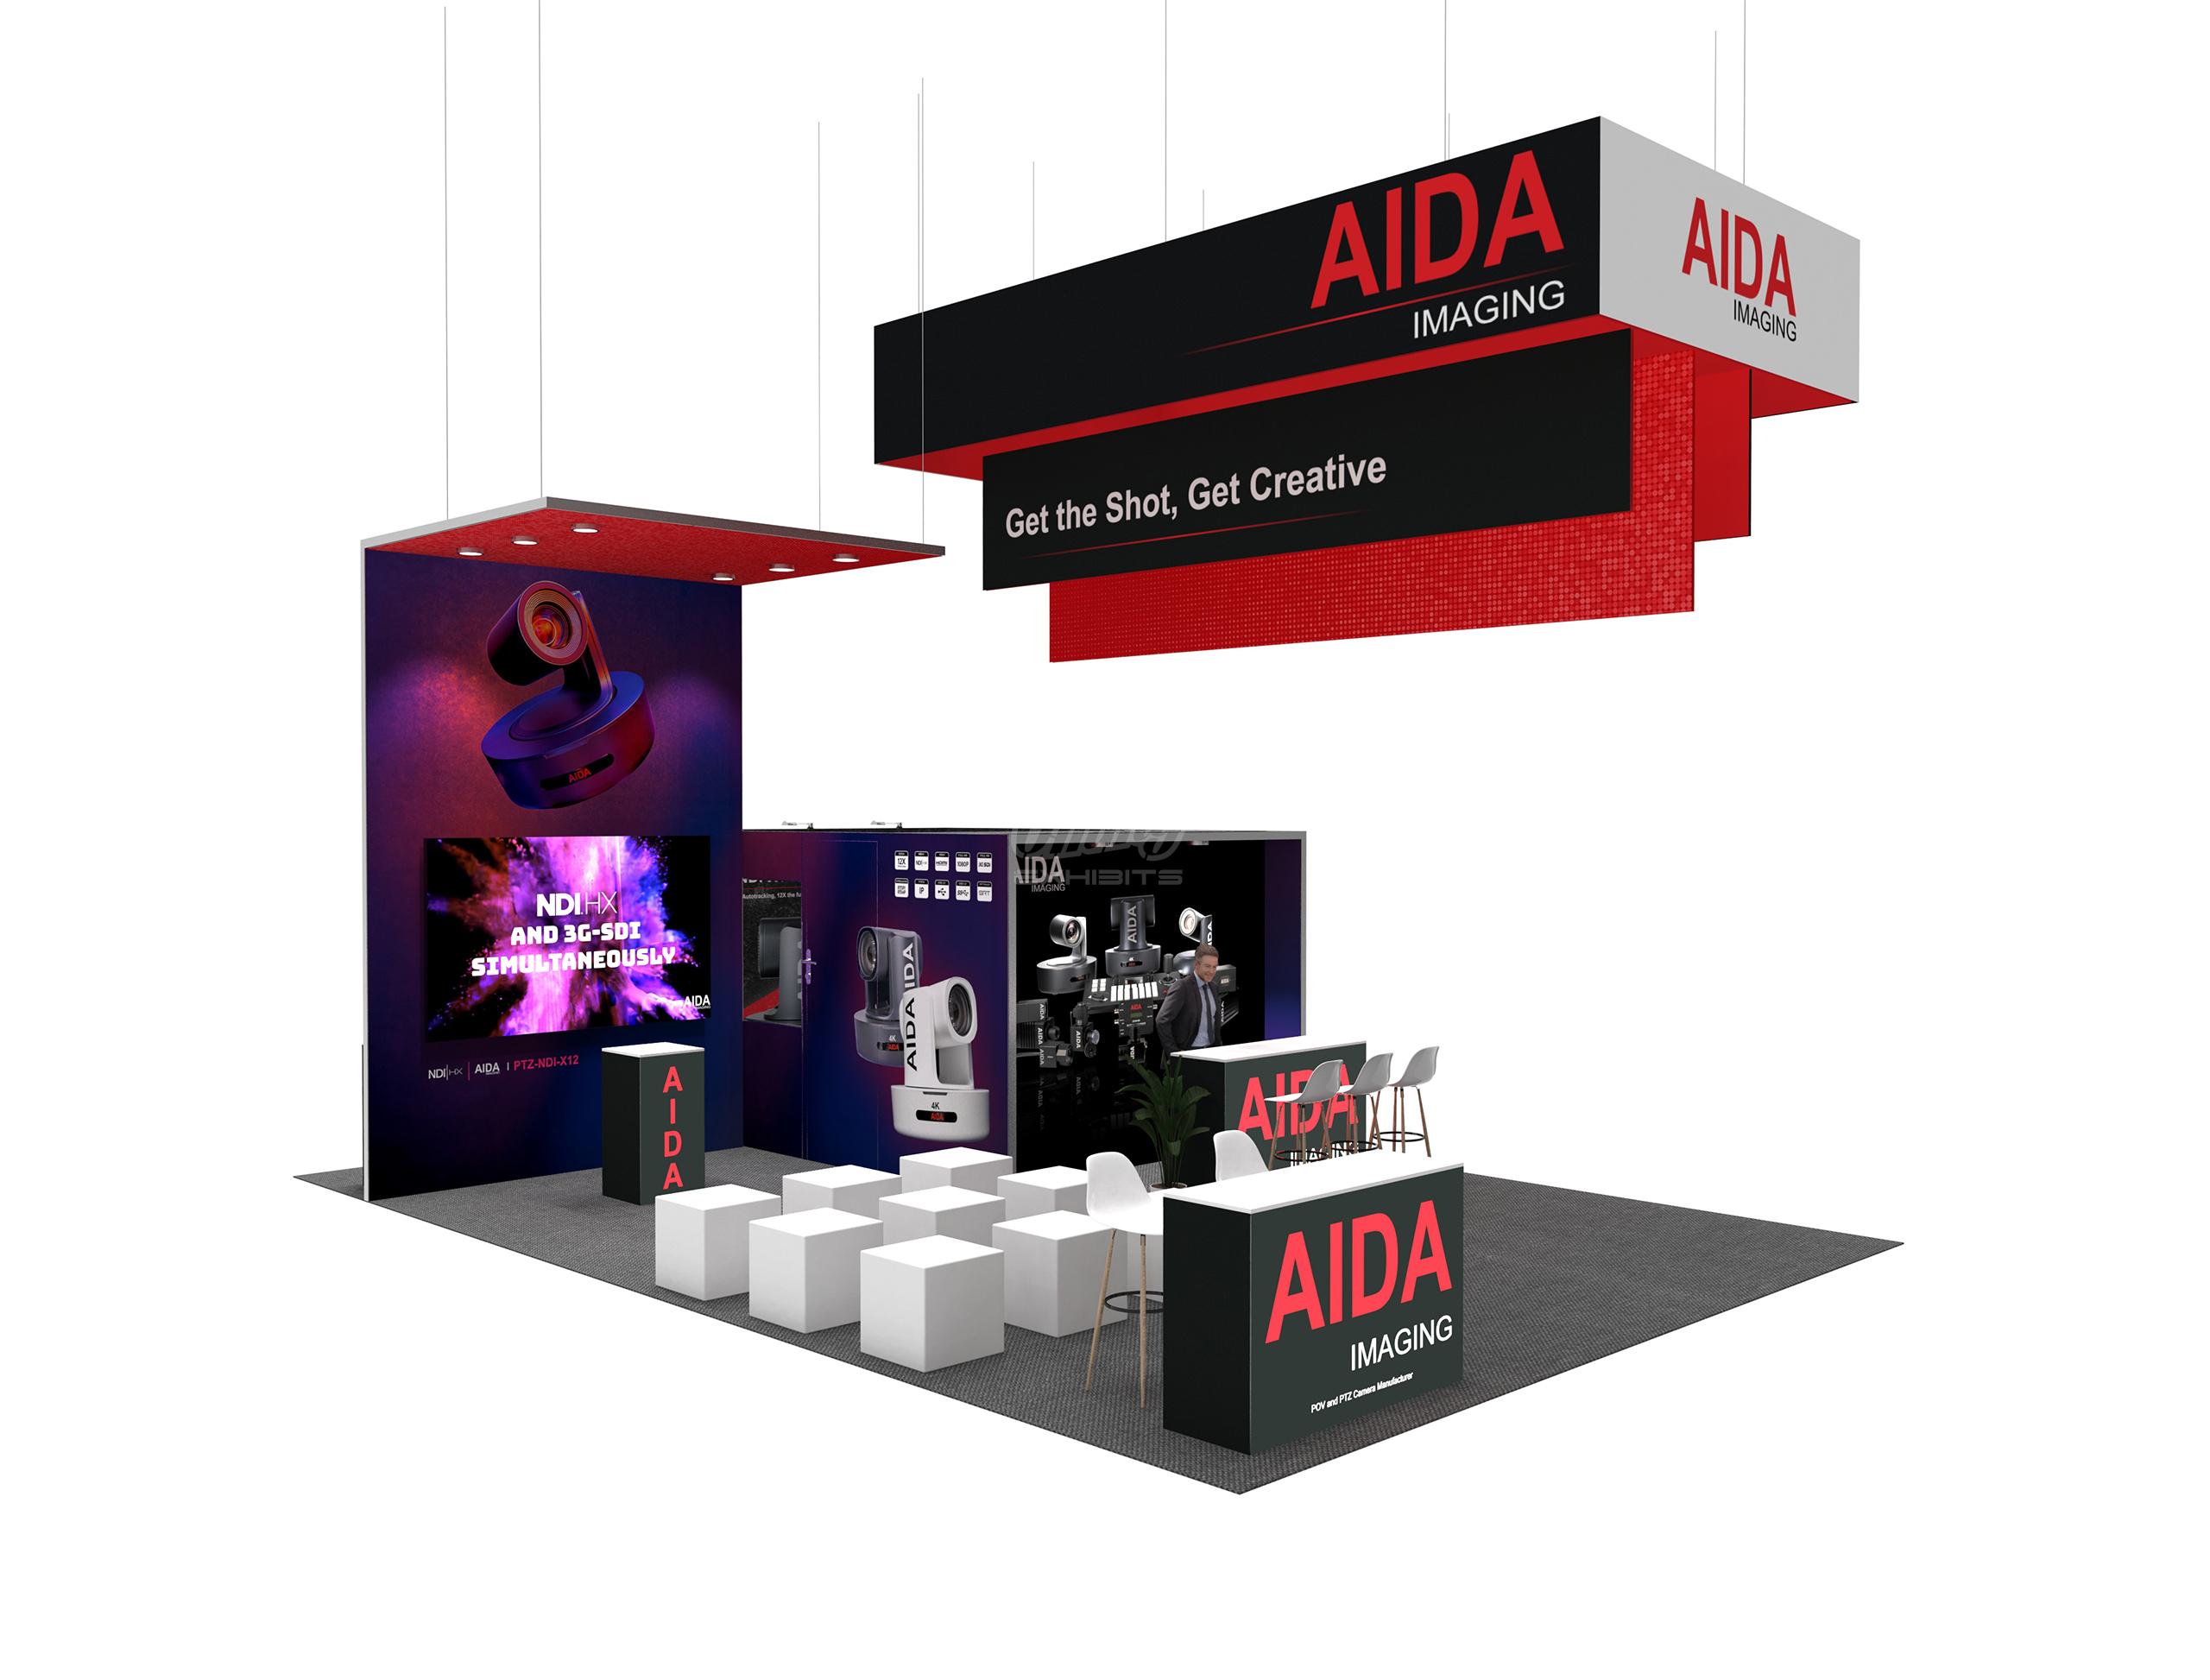
Custom exhibit work moves faster when it starts from geometry that already works. RLU2030-115 is a 20×30 island rental built around a pre-designed layout that includes a striking unique hanging sign, a central large video display, a dedicated demo structure, a relaxed bar setup, and a presentation area with nine ottomans. Those elements answer the hard layout questions: how the booth reads from multiple aisles, where weight sits, and how a visitor moves from the edge of the space into a conversation or demo. Customization then becomes a set of edits rather than a blank-page build.
The brand team decides which surfaces carry messaging, how large the logo reads on the lightboxes or video wall, what the hanging sign says, and how the graphics sequence as someone walks around the island. Design direction is applied to a known frame, and print files, dimensions, and mounting details follow from that frame. Three inputs drive every change: the artwork you send, the show schedule you are working against, and current stock. Your account contact confirms the custom scope against those three inputs before anything is cut or printed.
What changes when structure, lightboxes, and hanging signs are customized
Most design decisions in a 20×30 island booth sit in three connected places: the modular frame that defines wall runs and panel joints, the lightboxes or illuminated surfaces that turn a wall into a bright brand surface, and the hanging sign that pulls attention from across the hall. Each affects the others. Changing a lightbox depth shifts where a panel joint lands and how a graphic breaks across a corner. Changing a wall run affects where the demo structure or bar meets the display face. Treating these as one system separates a clean custom build from a pile of good-looking parts.
How modular frame and lightbox changes are confirmed
Frame changes are confirmed against panel spans and connection points rather than drawn freehand. If the design calls for a taller lightbox wall, a wider graphic face, or an added return, the shop checks it against the stocked frame system and panel joins, then defines what shape the change can take. Lightboxes combine structure and graphics, so a change is three decisions in one: how deep the box can be, how the printed graphic is tensioned or mounted, and how power reaches it. Confirm all three together. A graphic designed for a flat wall reads differently across an illuminated box, and a box planned without a power path can force a change later. The show date belongs in that conversation early because it shapes what is realistic.
How hanging sign graphics and pre-build review reduce risk
The unique hanging sign is the element people see first, so it deserves the most deliberate artwork. Ask for the actual dimensions and bleed line before composing. Hanging signs also come with venue rules. The design team can shape the sign and prepare the artwork; venue sign-off and rigging are handled with the facility and its rigging contractor. Plan the graphics early and handle venue paperwork in parallel. The pre-build preview then lets you check the sign graphics in place with the rest of the booth before shipping.
How artwork and pre-build preview reduce production guesswork
Artwork is where custom exhibit schedules usually slip. The shop needs print-ready files sized to the actual graphic areas—the lightbox faces, printed wall areas, the video display surround, and the hanging sign face—built at a scale that holds up when enlarged. Send working files with live text where possible, placed images at full resolution, and any logo or color standards your brand team enforces. The pre-build preview closes the loop and is part of the package before shipping. The booth gets assembled in the shop with printed graphics in place, and you review the result: how the lightboxes and central video wall read, whether the hanging sign graphics land where intended, how the demo structure and bar sit in the space, and whether the overall flow works. Feedback at that stage is a design fix; feedback after the booth ships is a show-floor problem.
Conclusion
Custom trade show exhibit design for a 20×30 space works best as a sequence: start from the proven rental structure, decide which surfaces carry the brand, confirm frame and lightbox changes against the actual system, compose the hanging sign artwork to its real shape, deliver print-ready files, and approve the booth at the pre-build preview. If you are planning a show and want branded lightboxes, a custom hanging sign, and printed graphics on the RLU2030-115 base, share your artwork status, show name, dates, and budget range so the team can confirm the custom scope and return a quote.
Browse more designs in our project gallery.
Frequently asked questions
Can a 20×30 rental booth be customized beyond the standard design?
Yes. RLU2030-115 starts from a pre-designed 20×30 island layout and supports customization on top of it, including branded lightbox graphics, printed wall graphics, custom artwork around the central video display, and graphics for the unique overhead hanging sign. You direct the design intent, and the team confirms what is achievable against your artwork, show schedule, and current stock before production begins.
What artwork files are needed for custom lightbox and hanging sign graphics?
Send print-ready files sized to the actual graphic areas the shop confirms for your build, with placed images at full resolution and live text where possible. Include your logo files, brand color values, and any approved photography. Ask for the exact dimensions and bleed for the hanging sign before you compose. If a third party created the artwork, clarify ownership in writing before files go to print.
Does a booth preview happen before final production and shipping?
The package includes a pre-build preview before shipping, so your booth is assembled with the printed graphics in place and reviewed while it is still in the shop. Use that review to check lightbox and video wall brightness, hanging sign graphics, graphic placement, and how the demo structure, bar, and seating read together. Adjustments approved at that stage remain design decisions instead of show-floor fixes.